Introduction
Kill Bill is the open-source subscription billing and payments platform.
The subscription billing features let you create recurring subscriptions (e.g. "gold plan subscription at $9.99/month") and manage upgrades and downgrades. The system will take care of generating invoices, managing credits and triggering payments.
The payment features let you connect with virtually any payment gateway and processor (Stripe, Braintree, PayPal, Adyen, CyberSource, etc.) to charge your customers (using credit or debit cards, ACH, wire transfers, Bitcoin, etc.) for their subscriptions or one-off payments (type shopping cart).
Check this video for a quick tour:
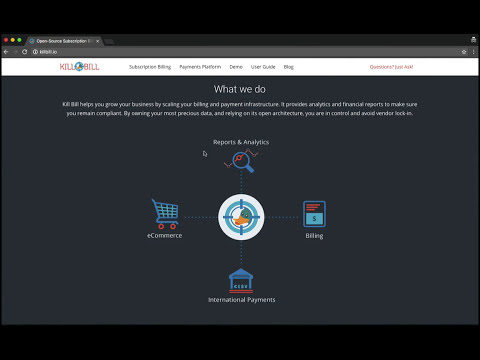
We refer to Kill Bill as a platform because of its extensibility: you can write plugins to modify the behavior of the system or to integrate with third-party vendors, such as fraud detection solutions (Accertify, Feedzai, etc.) or Tax providers (Avalara AvaTax, etc.). A lot of open-source plugins are available on our GitHub.
Kill Bill is a standalone Java server that runs in your back-end. Your customers will never interact with it directly, instead your website will trigger REST API calls (over HTTP) to process subscriptions or orders. We also provide Kaui, the Kill Bill administrative UI, an interface to interact with Kill Bill for your support and finance teams (to manage refunds, invoice adjustments, etc.).
Installation
Docker is the recommended way to run Kill Bill, both for developers and in production. Our Docker images rely on KPM, the Kill Bill Package Manager. It is a low-level tool to setup Kill Bill, its plugins and Kaui.
For simplicity in this guide, we will install Kill Bill using KPM.
Prerequisites
Ruby
Ruby is required to run KPM itself (it is not a dependency of Kill Bill).
Ruby 2.1+ or JRuby 1.7.20+ is recommended. If you don’t have a Ruby installation yet, use RVM:
gpg --keyserver hkp://keys.gnupg.net --recv-keys 409B6B1796C275462A1703113804BB82D39DC0E3
\curl -sSL https://get.rvm.io | bash -s stable --ruby
After following the post-installation instructions, you should have access to the ruby and gem executables.
Java
Kill Bill runs on the Java platform, version 6 and above (8 is recommended).
KPM
To install Kill Bill and Kaui, run:
gem install kpm
mkdir killbill
cd killbill
kpm install-
Tomcat (open-source Java web server) is setup in the killbill directory
-
The Kill Bill application (war) is installed in the killbill/webapps directory
-
The Kill Bill UI (Kaui war) is installed in the killbill/webapps directory
-
Default plugins are installed in the /var/tmp/bundles directory, among them:
-
jruby.jar, required to run Ruby plugins
-
the KPM plugin, required to (un-)install plugins at runtime
-
To start Kill Bill, simply run
./bin/catalina.sh runTo verify your installation, check that Kaui is running by going to http://127.0.0.1:8080/kaui.
A note on the default installation
Database
By default, Kill Bill writes its data to a file-based h2 database (you can browse the data by going to http://127.0.0.1:8082/: JDBC URL jdbc:h2:file:/var/tmp/killbill, username killbill, password killbill), while Kaui to a file-based SQLite database (you can browser the data with DB4S, the database is at /var/tmp/kaui.sqlite3).
When you start to get more familiar with Kill Bill, we recommend you switch to MySQL or PostgreSQL. The Kill Bill DDL is available on our downloads page and the Kaui DDL is available on GitHub.
To do so, add the following to the bottom of conf/catalina.properties (update urls and credentials as needed):
# Kill Bill properties
org.killbill.dao.url=jdbc:mysql://127.0.0.1:3306/killbill
org.killbill.dao.user=killbill
org.killbill.dao.password=killbill
org.killbill.billing.osgi.dao.url=jdbc:mysql://127.0.0.1:3306/killbill
org.killbill.billing.osgi.dao.user=killbill
org.killbill.billing.osgi.dao.password=killbill

# Kaui properties
kaui.db.adapter=jdbcmysql
kaui.db.url=jdbc:mysql://localhost/kaui
kaui.db.username=killbill
kaui.db.password=killbill
Catalog
The default catalog, i.e. the configuration file which contains the list of plans available and their characteristics, is called SpyCarBasic. It describes a shop that offers rental cars for spies (e.g. Sports car, rented monthly). We will describe later how you can configure your own catalog, containing your products and plans.
Using Kill Bill with Kaui
Go to http://127.0.0.1:8080/kaui. You will be prompted for a username and password. Both Kill Bill and Kaui support role based access control (RBAC), where you can configure fine-grained permissions for your users. The default set of credentials is admin/password, which grants full access.
Because Kill Bill supports multi-tenancy (where each tenant has its own data, configuration, etc.), the next step is to create your own tenant. We will assume the api key is "bob" and api secret "lazar" in the rest of this guide.
For more details on RBAC and multi-tenancy, check out this blog post.
Once you are logged-in, create a new Kill Bill account by going to http://127.0.0.1:8080/kaui/accounts/new. All fields are optional. One field that might be of interest is "External key", that you can populate with a unique identified for that account.
Creating your first subscription
Once the account is created, go to the subscriptions tab and create a new subscription bundle: a subscription bundle is a collection (bundle) of subscriptions, containing one base subscription and zero or more add-ons.
By going to the invoices tab, you should see that an $0 invoice has been automatically generated for the trial period.
Modifying the catalog
Your tenant configuration screen lets you create your own plans.
For more details on the catalog and its concepts, check out our main subscription billing userguide.
We also have various screencasts on our Youtube channel to help.
Triggering your first payment
To trigger payments, the account must first have one or several payment methods (credit card, PayPal, etc.). These map to specific gateway plugins (e.g. a payment method could represent a credit card token in Stripe).
Add a payment method by going to the main account screen, then click Add payment method in the Payment Methods section. By default, Kill Bill comes only with the EXTERNAL_PAYMENT payment plugin, which is used to track offline payments made by checks or cash.
Once created, you have several operations available on that payment method: authorize (as in credit card authorization), purchase (authorization with auto-capture) and credit (fund the payment method). These operations are gateway specific. In case of the EXTERNAL_PAYMENT, you would trigger a purchase. When creating the payment, you can specify the "Payment key", i.e. a unique identifier for that payment, as well as a "Transaction key": a payment can map to several transactions (for example, a purchase then a refund).
Note that we charged the customer directly, regardless of his subscriptions and invoices: you would use these operations in case of one-off shopping cart scenarios. However, if a payment method is select as default (you can set it by clicking the star next to the payment method), the subscription system will use it to trigger payments automatically for outstanding invoices.
Using Kill Bill from your application
Now that you are familiar with the basics, the next step is to integrate Kill Bill in your application using our APIs. We offer Ruby and Java clients that are officially supported. The open-source community is maintaining the PHP, python, NodeJS and Scala versions.
Ruby
Get the killbill-client gem:
gem install killbill-clientHere is a snippet creating your first account and subscription:
require 'killbill_client'

KillBillClient.url = 'http://127.0.0.1:8080'

# Multi-tenancy and RBAC credentials
options = {
  :username => 'admin',
  :password => 'password',
  :api_key => 'bob',
  :api_secret => 'lazar'
}

# Audit log data
user = 'me'
reason = 'Going through my first tutorial'
comment = 'I like it!'

# Create an account
account = KillBillClient::Model::Account.new
account.name = 'John Doe'
account.first_name_length = 4
account.external_key = 'john-doe'
account.currency = 'USD'
account = account.create(user, reason, comment, options)

# Add a subscription
subscription = KillBillClient::Model::Subscription.new
subscription.account_id = account.account_id
subscription.plan_name = 'sports-monthly'
subscription = subscription.create(user, reason, comment, nil, true, options)

# List invoices
account.invoices(true, options).each do |invoice|
  puts invoice.inspect
end
We have lots of examples in our integration tests.
Java
Get the jar from Maven Central:
<dependency>
    <groupId>org.kill-bill.billing</groupId>
    <artifactId>killbill-client-java</artifactId>
</dependency>
Here is a snippet creating your first account and subscription:
import org.killbill.billing.catalog.api.BillingPeriod;
import org.killbill.billing.catalog.api.PriceListSet;
import org.killbill.billing.catalog.api.ProductCategory;
import org.killbill.billing.client.KillBillClient;
import org.killbill.billing.client.KillBillClientException;
import org.killbill.billing.client.KillBillHttpClient;
import org.killbill.billing.client.model.Account;
import org.killbill.billing.client.model.Invoice;
import org.killbill.billing.client.model.Subscription;

public class KillBillDemo {

    public static void main(final String[] args) throws KillBillClientException {
        final KillBillHttpClient killBillHttpClient = new KillBillHttpClient("http://127.0.0.1:8080",
                                                                             "admin",
                                                                             "password",
                                                                             "bob",
                                                                             "lazar");
        final KillBillClient killBillClient = new KillBillClient(killBillHttpClient);

        // Audit log data
        final String user = "me";
        final String reason = "Going through my first tutorial";
        final String comment = "I like it!";

        // Create an account
        Account account = new Account();
        account.setName("John Doe");
        account.setFirstNameLength(4);
        account.setExternalKey("john-doe");
        account.setCurrency("USD");
        account = killBillClient.createAccount(account, user, reason, comment);

        // Add a subscription
        Subscription subscription = new Subscription();
        subscription.setAccountId(account.getAccountId());
        subscription.setPlanName("sports-monthly");
        subscription = killBillClient.createSubscription(subscription, 5, user, reason, comment);

        // List invoices
        for (final Invoice invoice : killBillClient.getInvoicesForAccount(account.getAccountId())) {
            System.out.println(invoice);
        }
        System.out.flush();
    }
}
We have lots of examples in our server tests.
Next steps
-
Write your own catalog. Here are some examples:
-
newspaper (with billing in arrear)
-
SpyCarAdvanced (with advanced alignment features)
-
UsageExperimental (with usage-based pricing)
-
-
Choose a payment gateway and install the corresponding plugin
-
Follow our tutorials to investigate specific topics, such as overdue (dunning) and usage billing
-
Go through our online demo, to get an overview of some of our advanced features
-
Get ready for production, by setting up Docker
-
For support along the way, reach out to our Google Groups